Edge banding machine mechanism debugging (2)-Pre milling mechanism
Edge banding machine pre milling mechanism
1. Introduction to component names
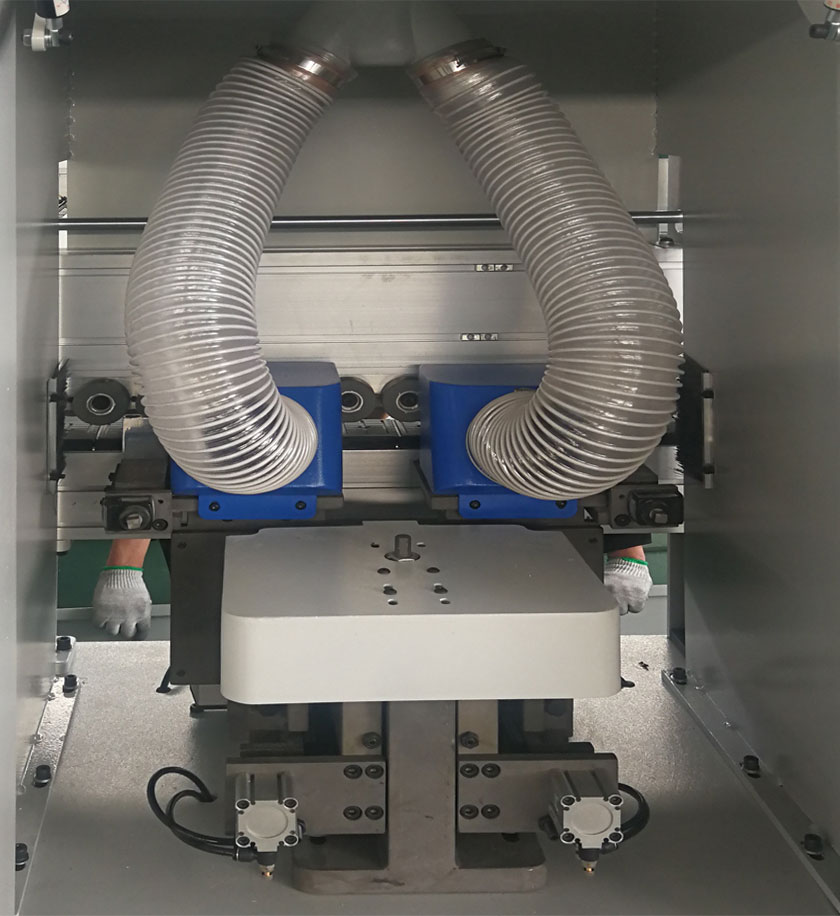
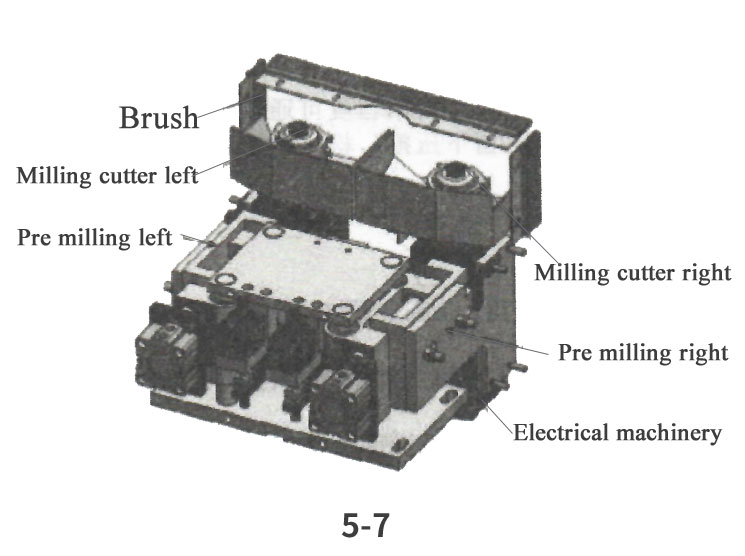
The pre milling mechanism is composed of milling cutter left, milling cutter right, motor, etc. The milling amount in the pre milling mechanism is adjusted according to the processing condition of the processed surface. Due to the possibility of the processed surface being tilted or incomplete during the cutting or transportation process, the edge sealing effect may not be ideal. After milling with a pre milling mechanism, various defects on the processed surface can be removed to achieve the best edge sealing effect. The pre milling mechanism mainly consists of a pre milling cutter, motor, cylinder, brush, etc.
2. Action process
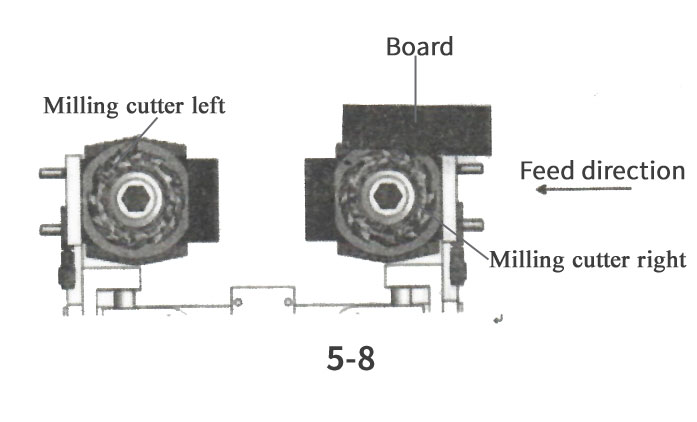
The working process of the pre milling mechanism is that the wooden board is tightly attached to the ruler and transported to the pre milling position through a travel switch. After that, the electromagnetic valve acts on the milling cutter (as shown in Figure 5-8, milling cutter right and milling cutter left) to carry out the pre milling work in sequence.
3. Adjustment method
Adjustment of pre milling mechanism
When adjusting the pre milling mechanism, it is necessary to first loosen the screws l, 2, and 3 in Figure 5-9 and then remove the entire pre milling cover, as shown in Figure 4-3. The sales volume of pre milling cutter can be adjusted by rotating screws 4 and 5 in Figure 5-9 (generally, the machining amount of the milling cutter should not be too large, otherwise it is easy to damage the milling cutter). By loosening screws 4 and 5 in Figure 5-9, the horizontal direction between the two milling cutters and the processed wooden board can be adjusted.
In Figure 5-9, handles 6 and 7 can be adjusted to adjust the vertical direction between the two milling cutters and the processed wood board. When adjusting, the left and right sides of the pre milling cutter must be in the same straight line. When leaving the factory, the milling amount of the two milling cutters is the same, and the counter is reset to zero.
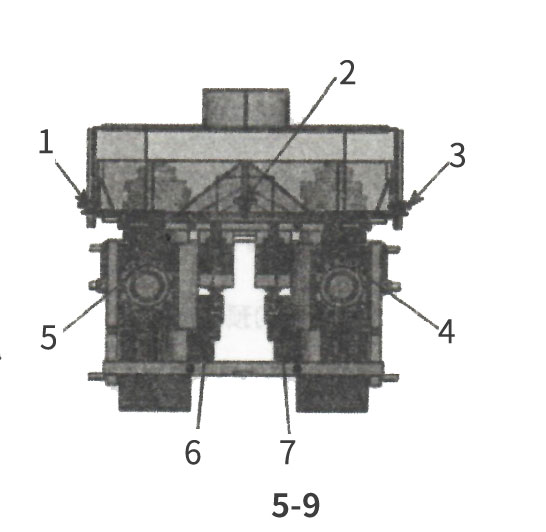
In general, the milling amount on the right side of the milling cutter should be greater than the milling amount on the left side of the milling cutter by 0 08-0.1mm, which can prevent the edges of the wooden board from exploding.
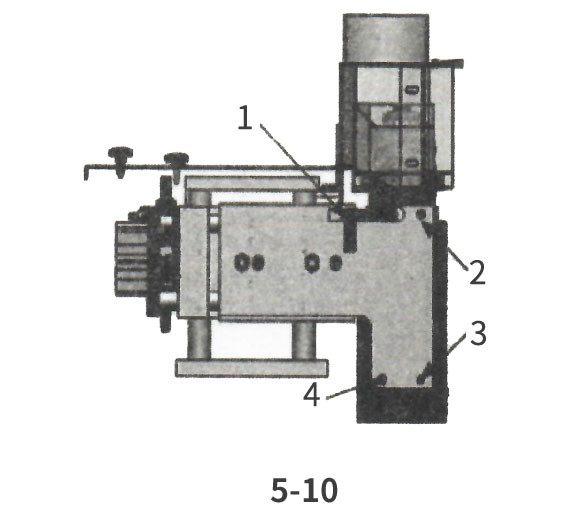
If there is unevenness in the pre milling surface, it indicates that the perpendicularity between pre milling cutter 1 and pre milling cutter 2 and the board surface has not been adjusted properly. In this case, adjustment can be made by using screw 1 in Figure 5-10. Loosen screw 1 in Figure 5-10 and fine tune the perpendicularity through screws 2, 3, and 4 in Figure 5-10. Repeat fine adjustments until a satisfactory pre milling effect is achieved.
4. Replace accessories
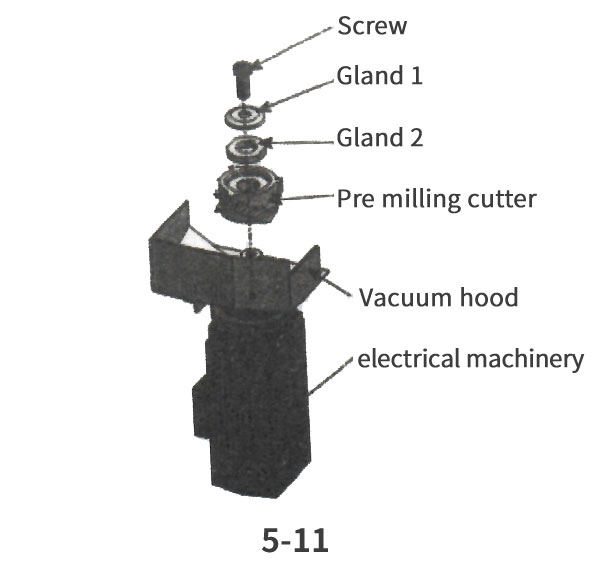
Steps for replacing the pre milling cutter:
1. Loosen the screws;
2. Remove the gland 1;
3. Remove the old pre milling cutter;
4. Replace with a new pre milling cutter (pay attention to the rotation direction of the cutter and motor)
5. Cover the gland and tighten the screws.

 info@313mac.com